Administrator
Applications and enrollmentReviewing and processing applications
Review incoming applications, approve or reject them, and communicate with families.
Last updated Oct 1, 2026
The applications queue
All incoming applications appear on Applications, opened from Today under Manage.
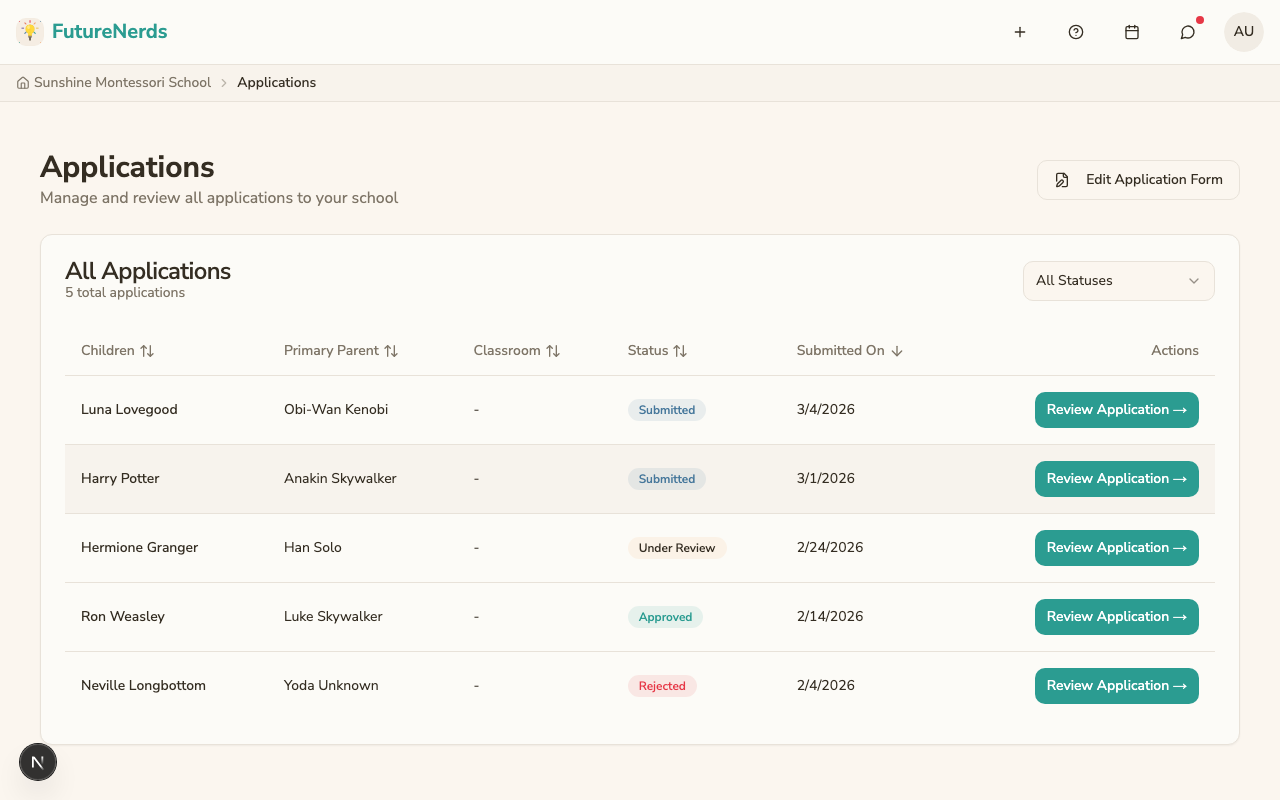
Each application shows:
- Child's name and age.
- Program applied to.
- Date submitted.
- Current status.
Reviewing an application
On the list, click Review Application →. That opens the application:
- All information the family provided.
- Any custom question responses.
- Emergency contacts and medical information.
The list statuses you will see include Submitted, Under Review, Approved, and Rejected. Filter with All Statuses.
Approving an application
- Open the application with Review Application →.
- Click Approve Application.
- The application status changes to Approved and the child's enrollment moves to Approved.
- The family receives an email notification.
- The child now appears in your children roster, ready to be assigned to a classroom.
Waitlisting an application
If you are not ready to approve or reject an application (for example, the classroom is full or you are waiting for more information):
- Open the application.
- Click Add to Waitlist.
- The status changes to Waitlisted and the family receives an email.
- You can approve or reject a waitlisted application at any time.
Waitlisted is not a final decision. It keeps the application in your queue for future action.
Rejecting an application
- Open the application.
- Click Reject Application.
- Optionally add a note explaining your decision.
- The family receives an email notification.
Tips
- Process applications in the order they arrive to be fair.
- Use the notes field to record any follow-up actions.
- Approved children must still be assigned to a classroom before they are fully enrolled.
Was This Helpful?