Getting started: set up your school
The full path from an empty account to a running school: settings, teachers, classrooms, applications, lessons, communication, meals, clubs, and billing.
Last updated Sep 30, 2026
This guide takes a new school from an empty account to a running one. Work through it in order the first week. Each step is a few minutes, and you can stop and come back at any point.
You do all of this as an administrator. Teachers and parents get their own, smaller set of tools once you invite them.
1. Create your first school
When you sign in for the first time you have no school yet. Click Add New School (the plus in the top bar) and fill in your school's name. That creates the school and makes you its owner and first administrator.
Everything else in this guide lives inside that school. If you run more than one school, repeat this step for each and switch between them from your avatar menu.
2. Set your most important school settings
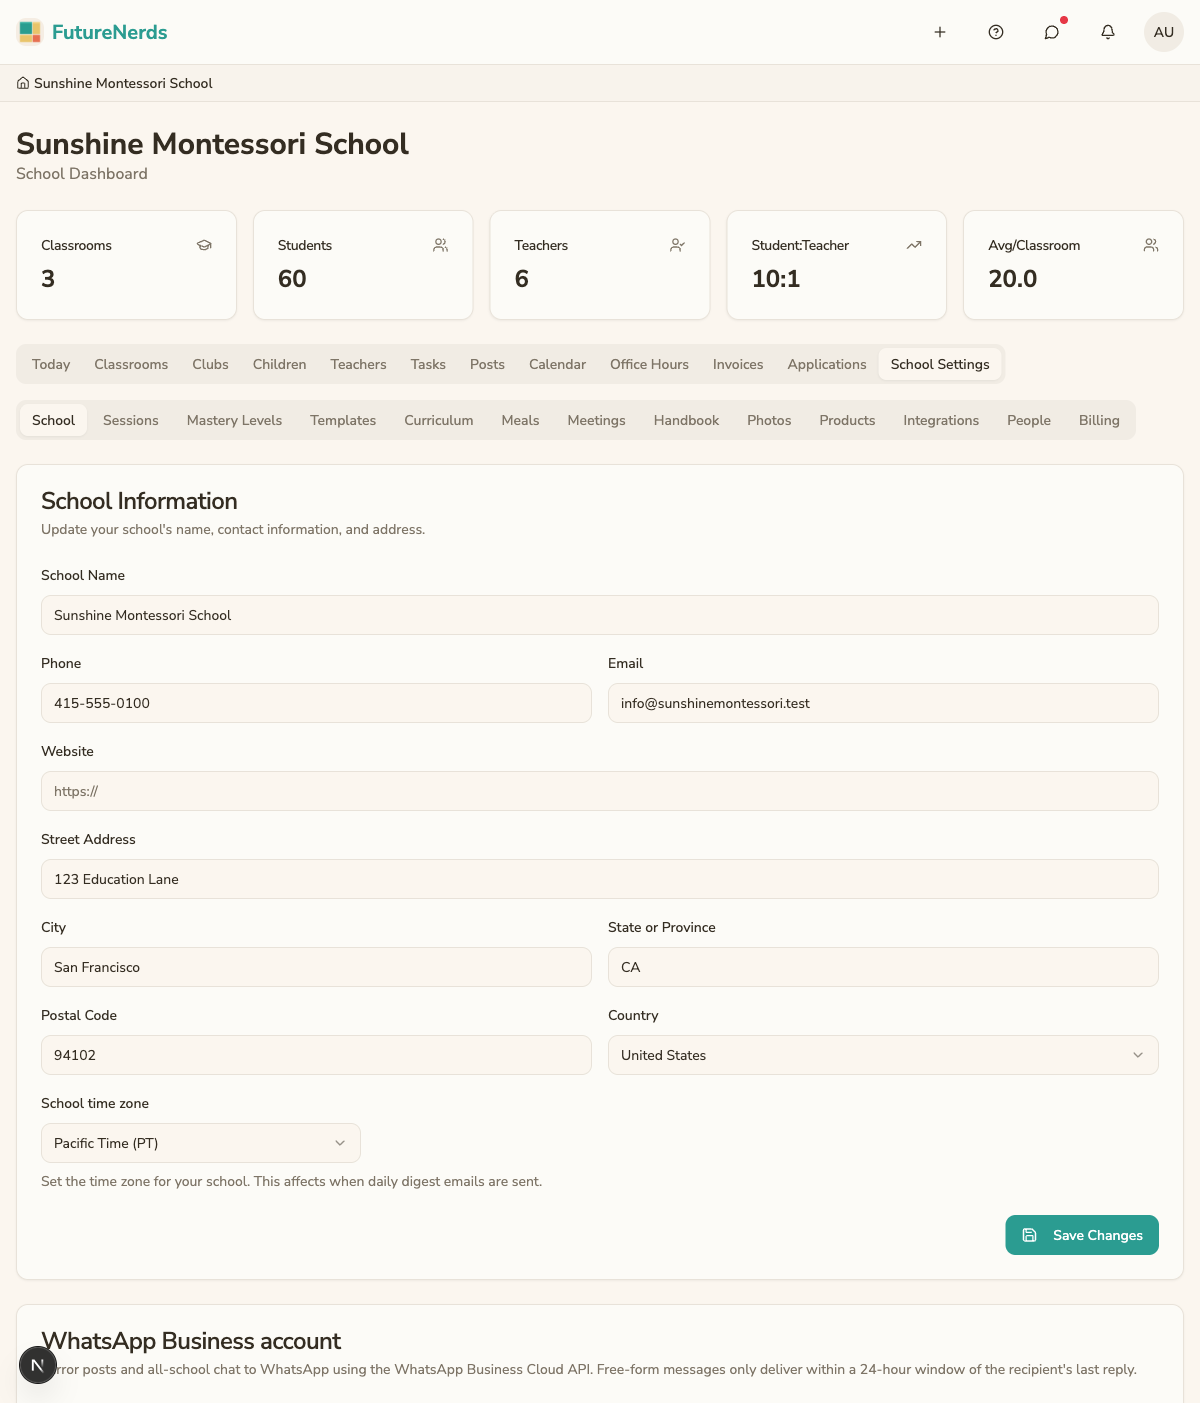
Open School Settings from your avatar menu (top right). You land on a searchable index of topics in seven groups: School, Learning, Operations, Applications, Money, Account, and Families. Settings is not in the top bar -- that bar is Today, Children, Rooms, Invoices, and Calendar.
Start with Profile and Contact for the identity families see:
- Name, address, and phone appear on invoices, the public application page, and emails to families.
- Time zone controls how every date and time displays for everyone at your school.
Then open these topics before you invite anyone:
- Branding -- upload a logo. It shows in the navigation bar and on pages families see.
- Tax and Currency -- set what families are billed in before you create products or invoices.
- Curriculum -- pick your framework and define the areas and competencies teachers plan and assess against.
- People and Roles -- invite another administrator by email, promote a teacher, or deactivate someone who has left.
See School Settings for the full index.
3. Add your teachers
Open People and Roles and use Add Teacher to invite each staff member by email. They receive an invitation and sign in with a one-time email code. Until they accept, they show as pending.
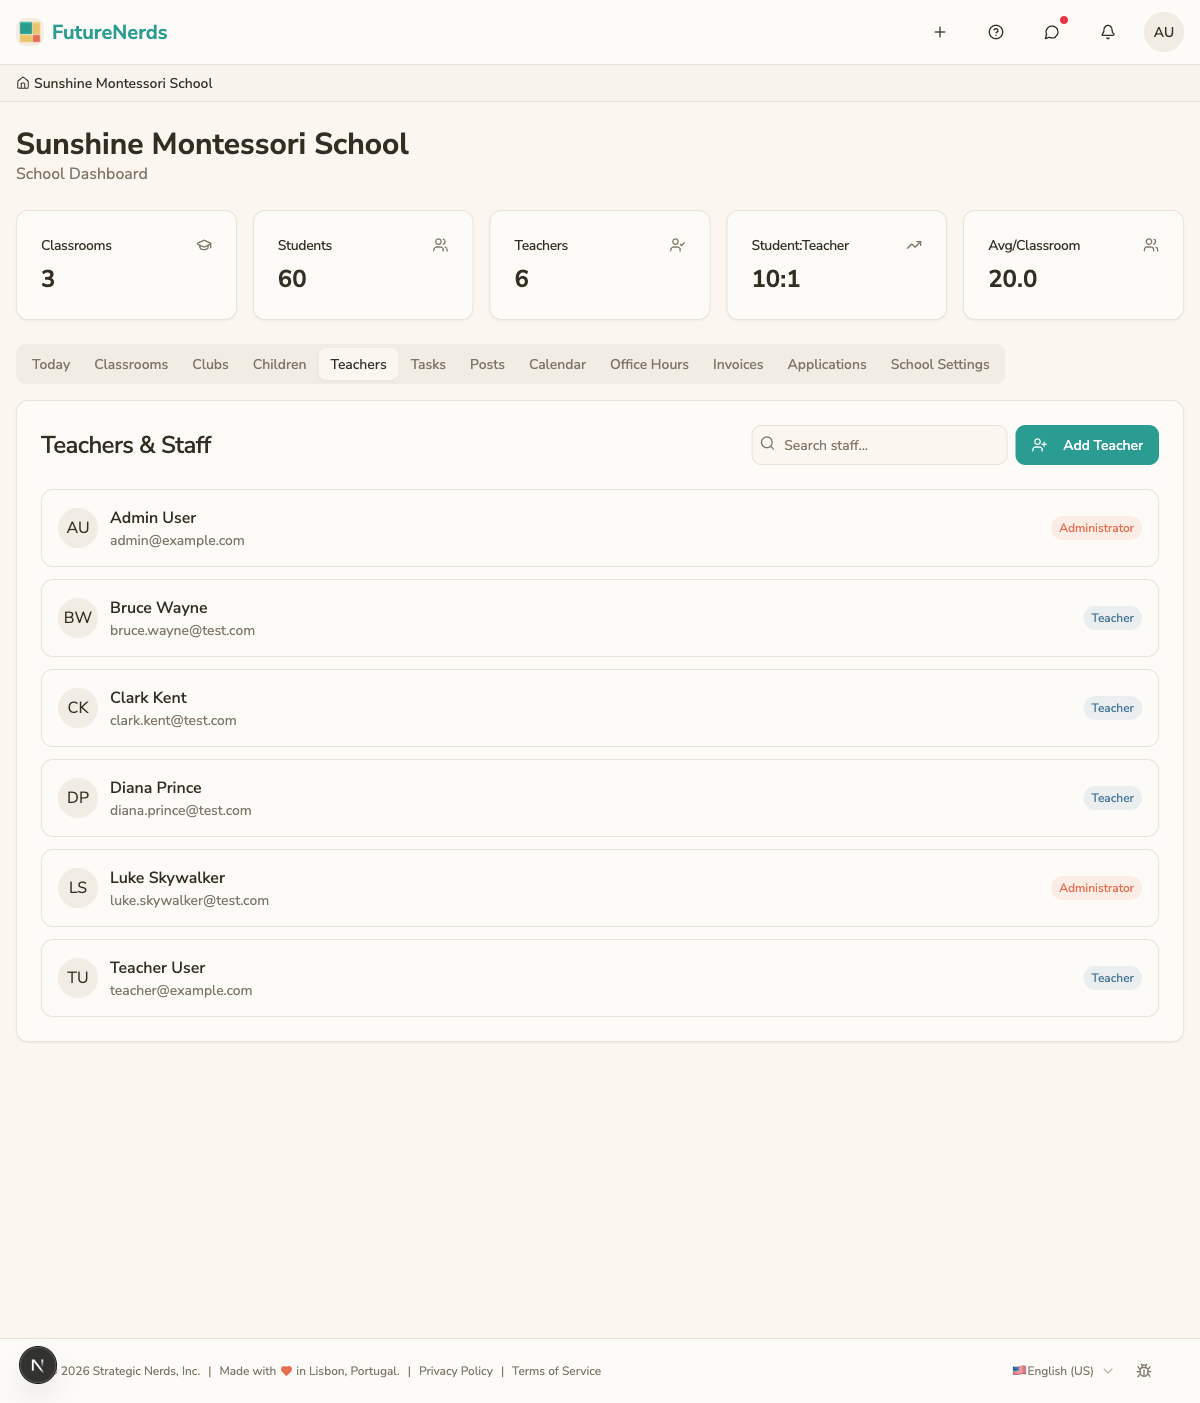
Invite assistants the same way. Roles decide what each person sees: teachers and assistants get the classroom tools, not the billing or admissions screens.
4. Create your classrooms
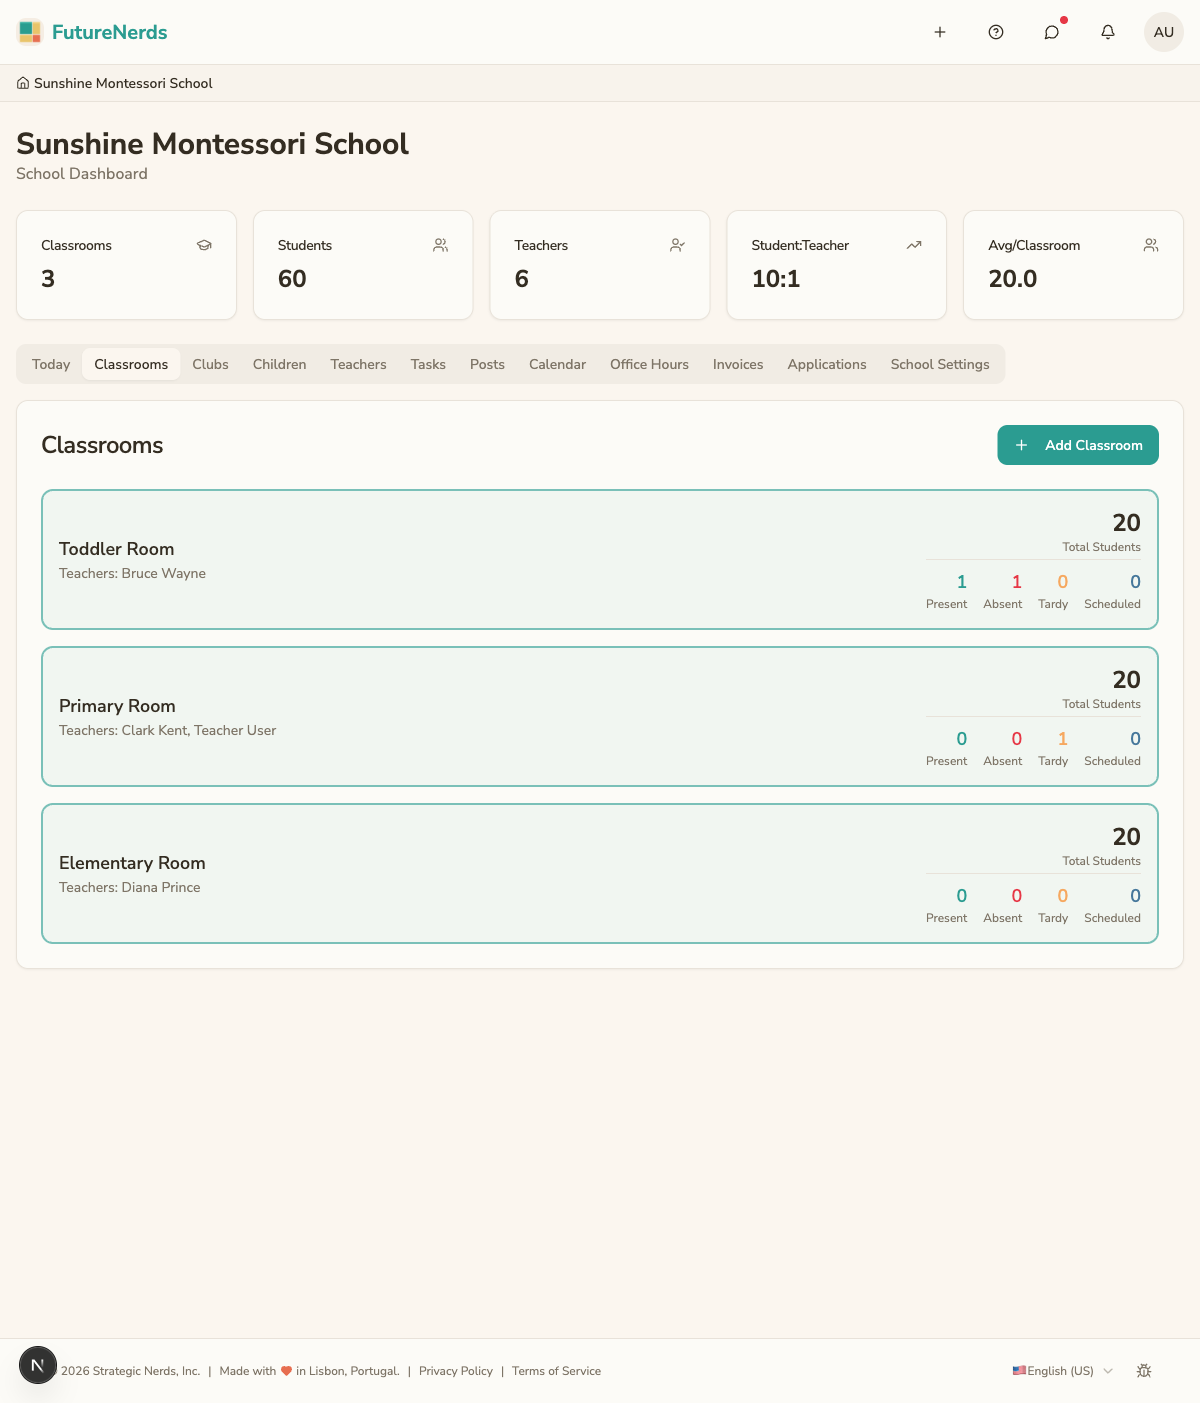
Open Rooms in the top bar, stay on Classrooms, and click Add Classroom for each room in your school. Give each one a name, an age range, a capacity, and a level (infant and toddler, primary, lower or upper elementary, or adolescent). The level controls which competencies and tracking options show up for that room.
5. Assign teachers to classrooms
Open a classroom, open People, and click Assign Teacher for the lead teacher and any assistants. The lead teacher is who attendance and records are attributed to.
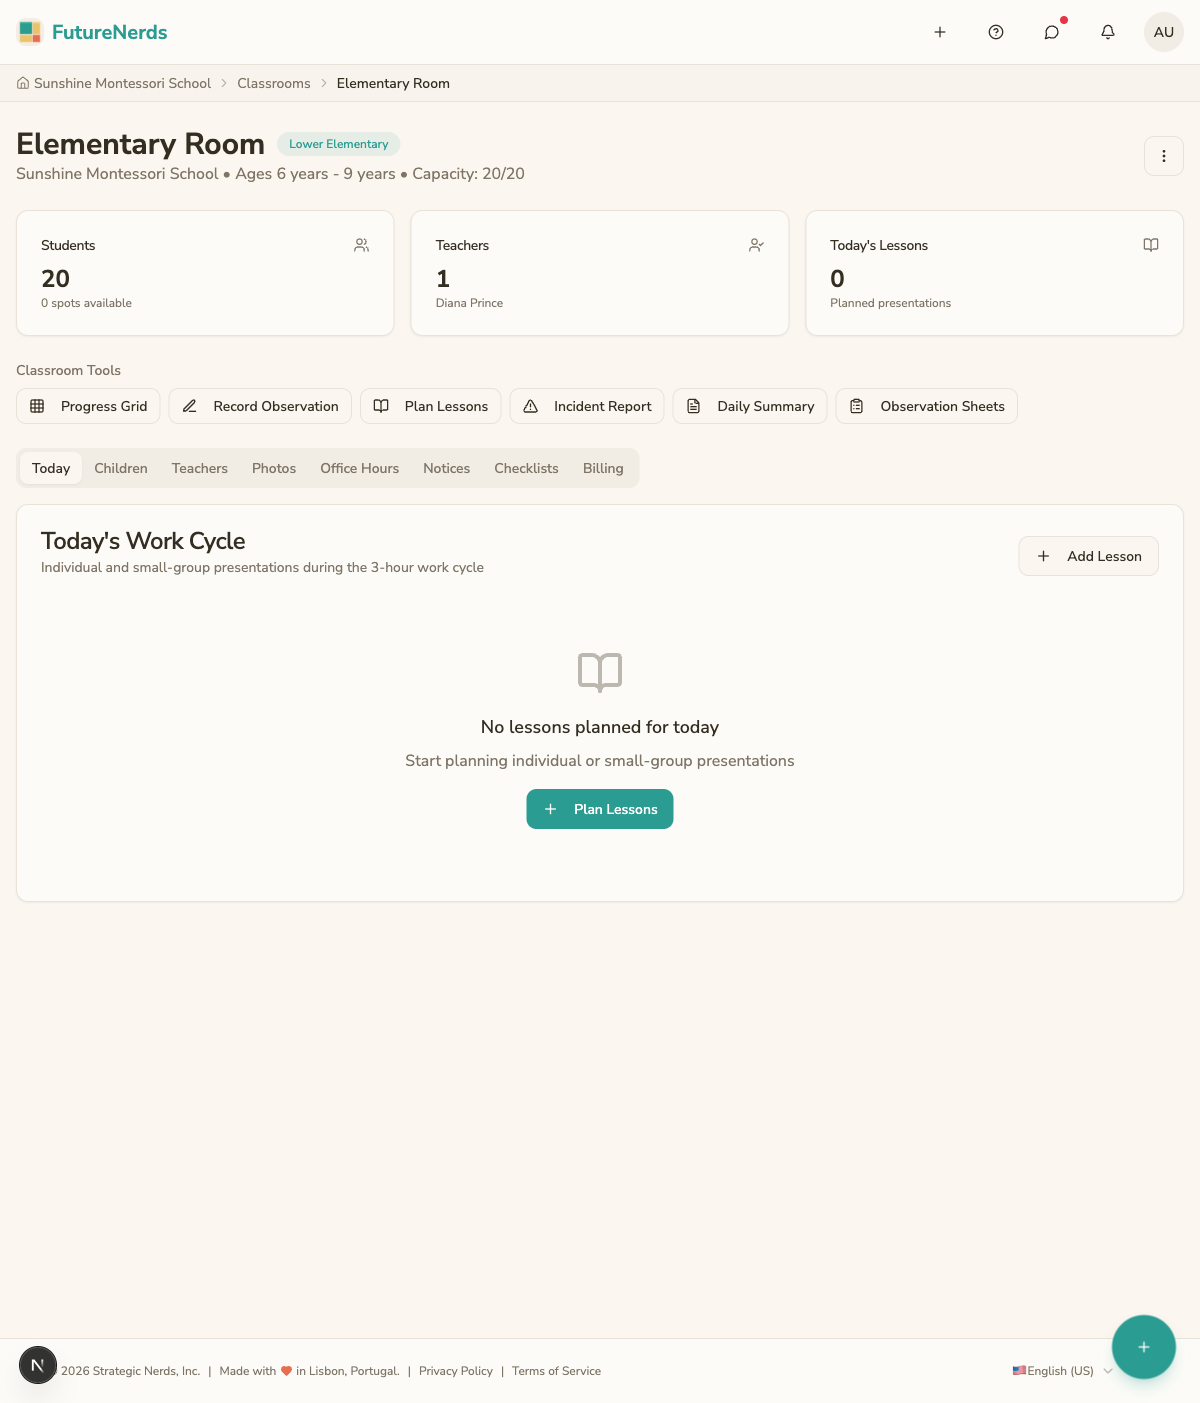
A teacher can lead one room and assist in another. Assign every room a lead before you start taking attendance.
6. Set up your application form
On Today, under Manage, open Applications, then click Edit Application Form. This is the public page families use to apply, at a URL you can share or link from your website. You can set the form title, a welcome message, and a thank-you message.
The form has a library of starter questions you can turn on, and you can add your own custom questions: short text, long text, single select, multiple select, and more. Reorder them to match how you want to read an application.
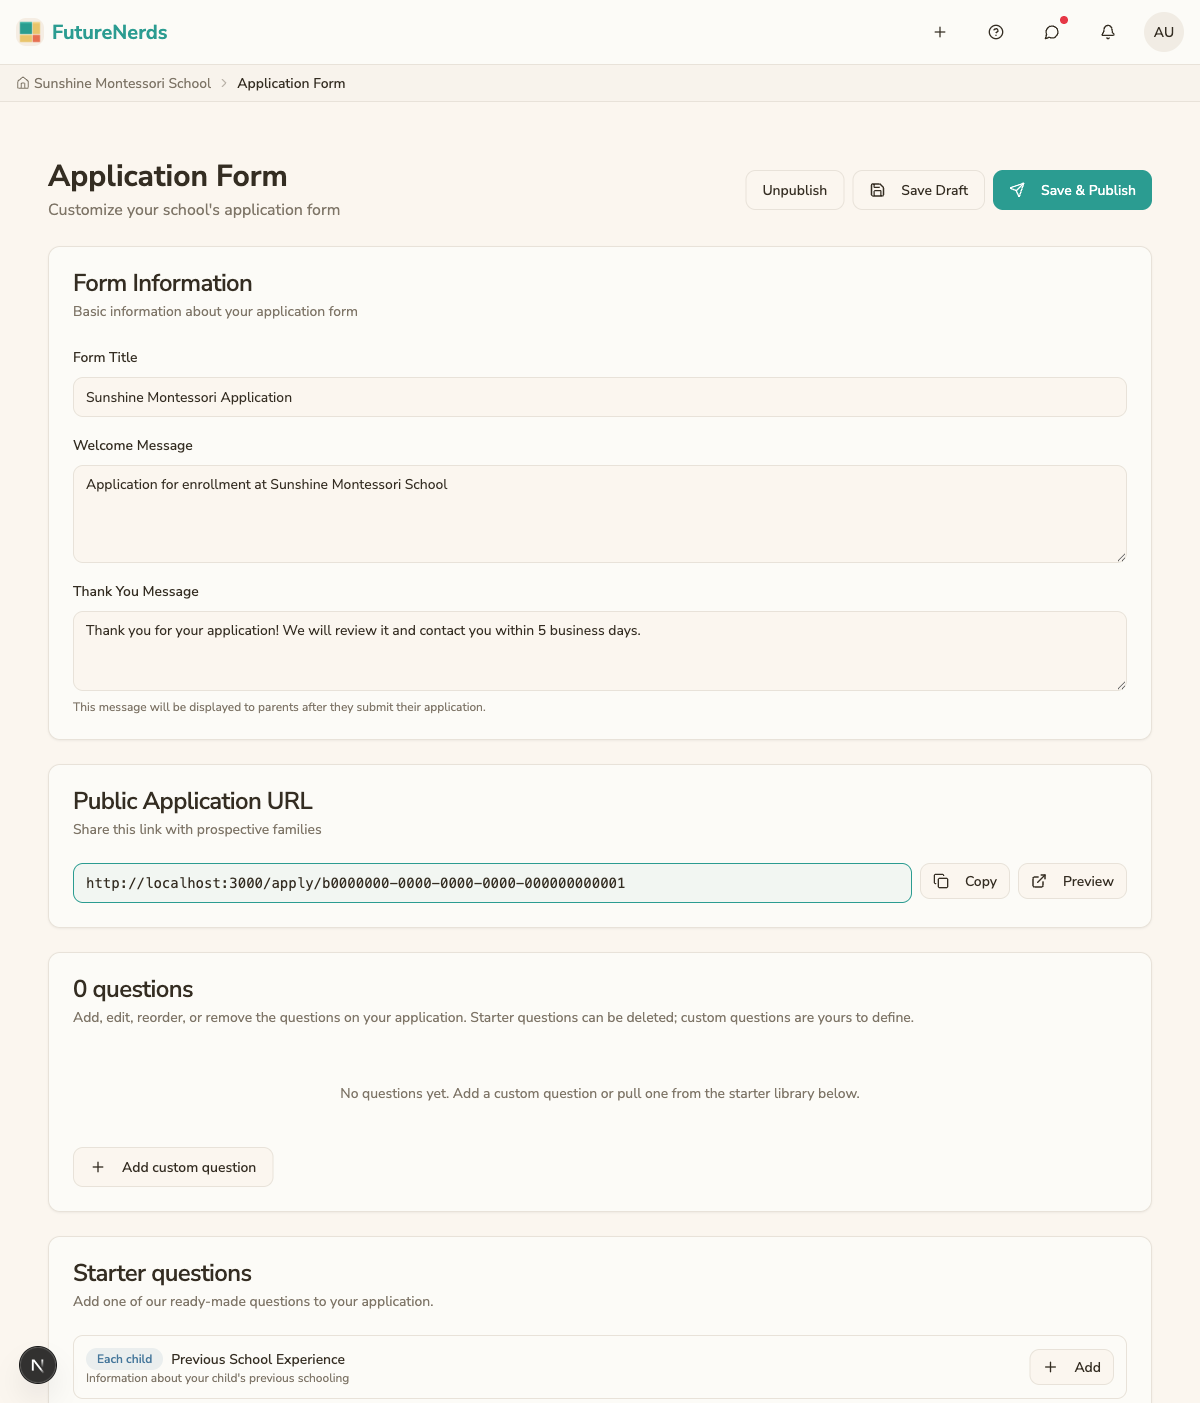
Publish the form when it is ready. You can unpublish or edit it any time.
7. Import your existing families
If you are moving an existing school onto FutureNerds, you already have a list of parents and children. On Children, open Invite Parent and choose Import Families. The same action also lives in School Settings under Families.
Upload a CSV or Excel file with parent first name, parent last name, parent email, child first name, child last name, and child birth date. Preview the rows, then import. That creates the children on your roster without waiting for a parent to sign up. After import you can assign classrooms, or skip and do that later.
Parents who already have a FutureNerds account are linked immediately and emailed only when a new child is added. Everyone else stays unclaimed until you invite them.
When you are ready, choose Invite Parents Who Have Not Logged In. That emails parents who still have no account, and parents who started an account but never finished onboarding. When they verify their email and finish onboarding, the imported children are already theirs.
You can still use Invite Several Parents if you only have emails and want parents to add their own children.
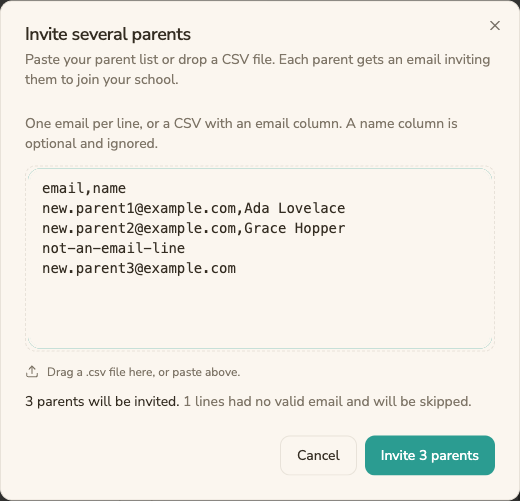
For a single family, the same button's Invite a parent option sends one invitation.
8. Assign children to classrooms
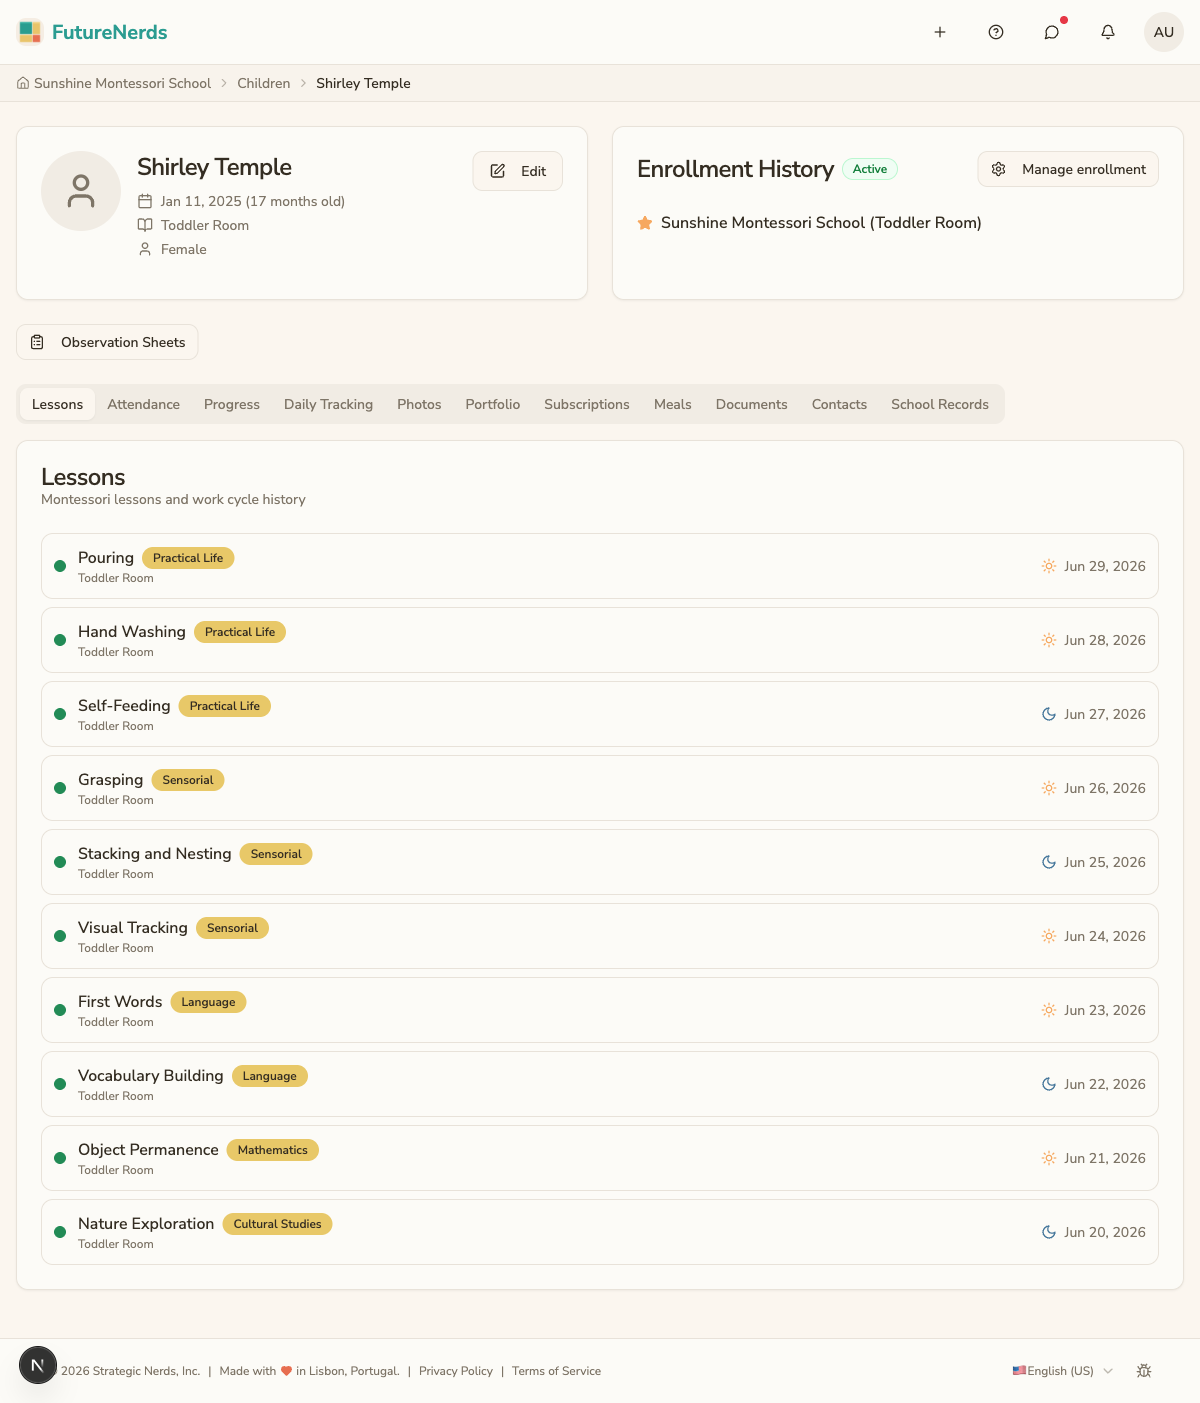
As children are added, place each one in a classroom. Open a child's profile and set their classroom, or add children to a room from the classroom's People tab. A child's classroom is what puts them on the right attendance sheet and progress grid.
9. Handle inbound applications
When a family applies, their application appears on Applications (from Today under Manage) as Submitted. Click Review Application → to see the guardians, the children, and the answers to your form, including your custom questions. Use Approve Application, Add to Waitlist, or Reject Application.
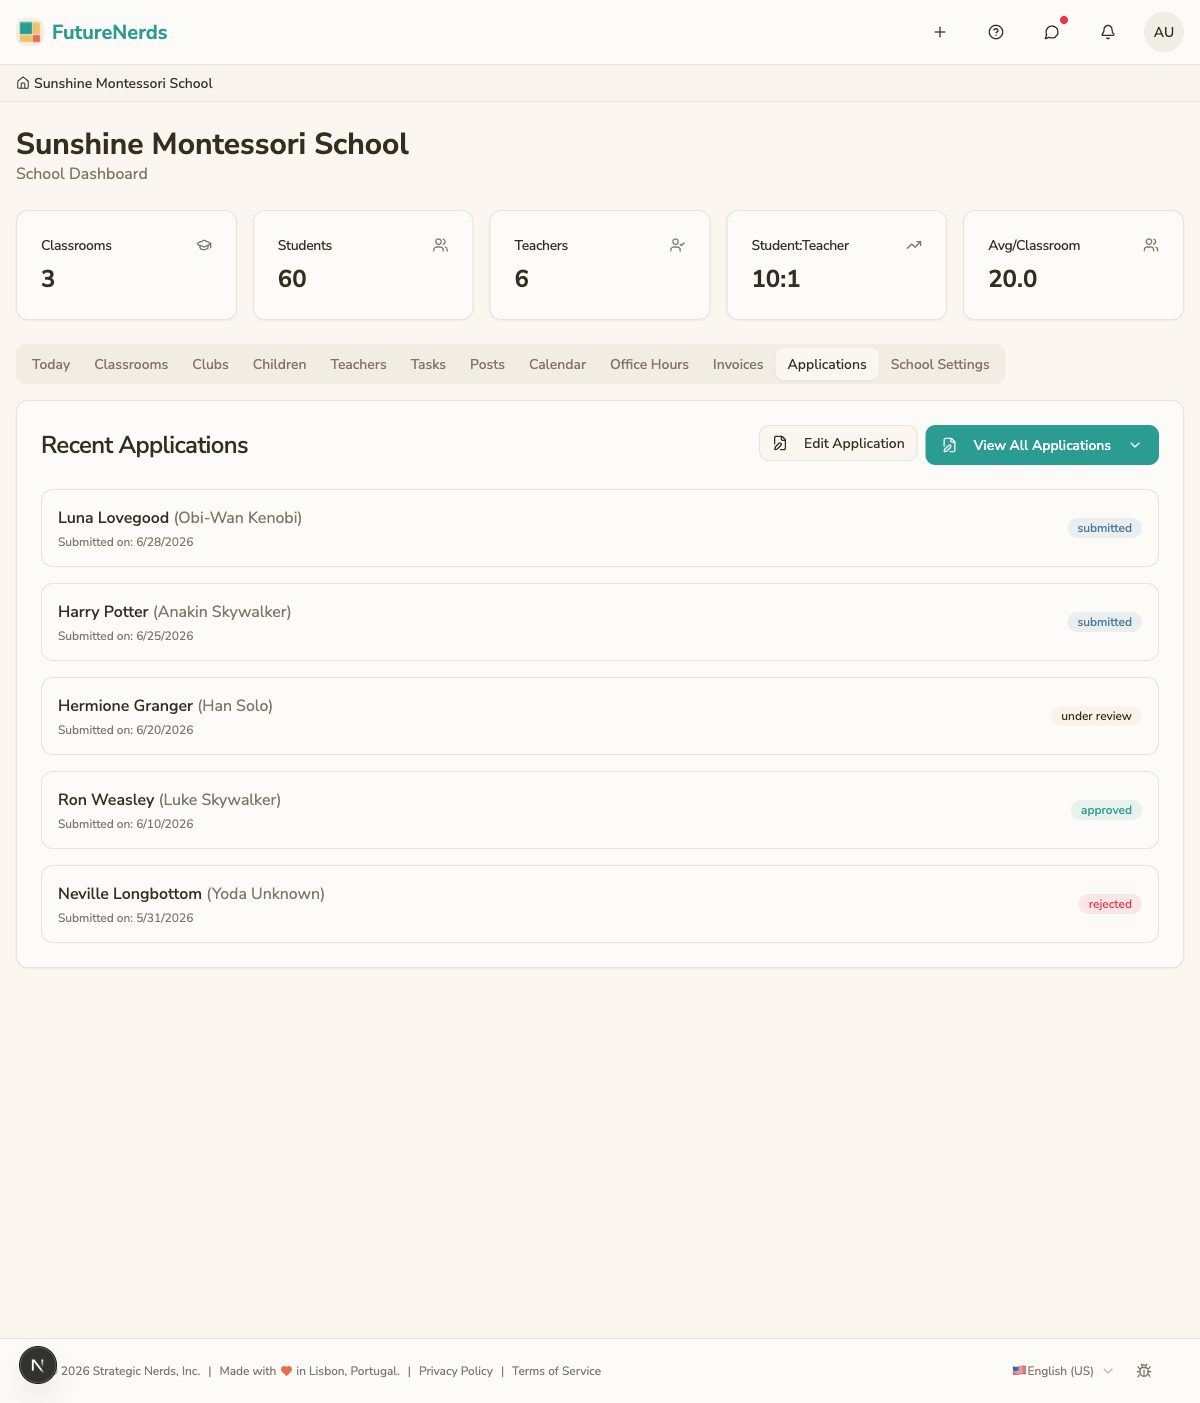
Move the application through its stages as you review it, schedule a tour, and decide. Accepting an application enrolls the child; once you assign them to a classroom they become active.
10. Create a lesson plan
Open a classroom and, under Classroom Tools, choose Plan Work Cycle. The planner is built around your curriculum: pick competencies from the Montessori Lesson Library, assign them to children for the morning or afternoon work period, and add any free-form activities alongside them.
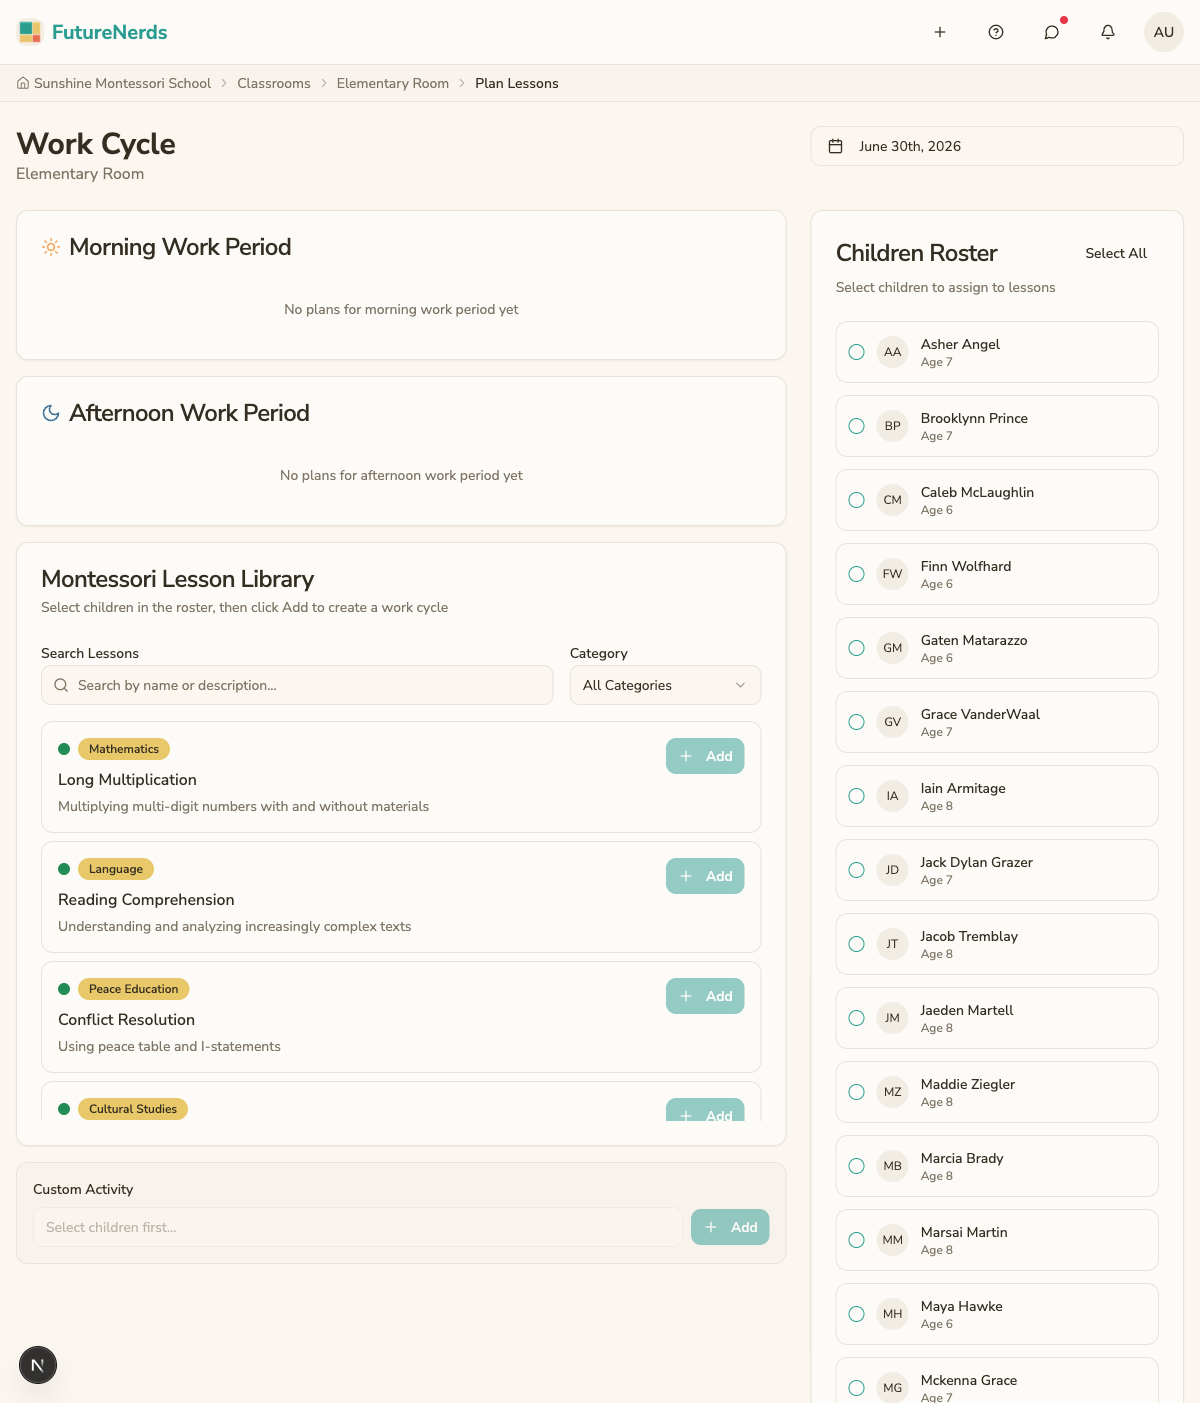
As children work, teachers record mastery (not yet presented, presented, practicing, mastered) right from the planner and the progress grid.
11. Post a message to the whole school
On Today, under Manage, open Posts, click Create Post, and click Publish Post. Posts are announcements that everyone at the school sees, with an optional expiry date so old notices clear themselves.
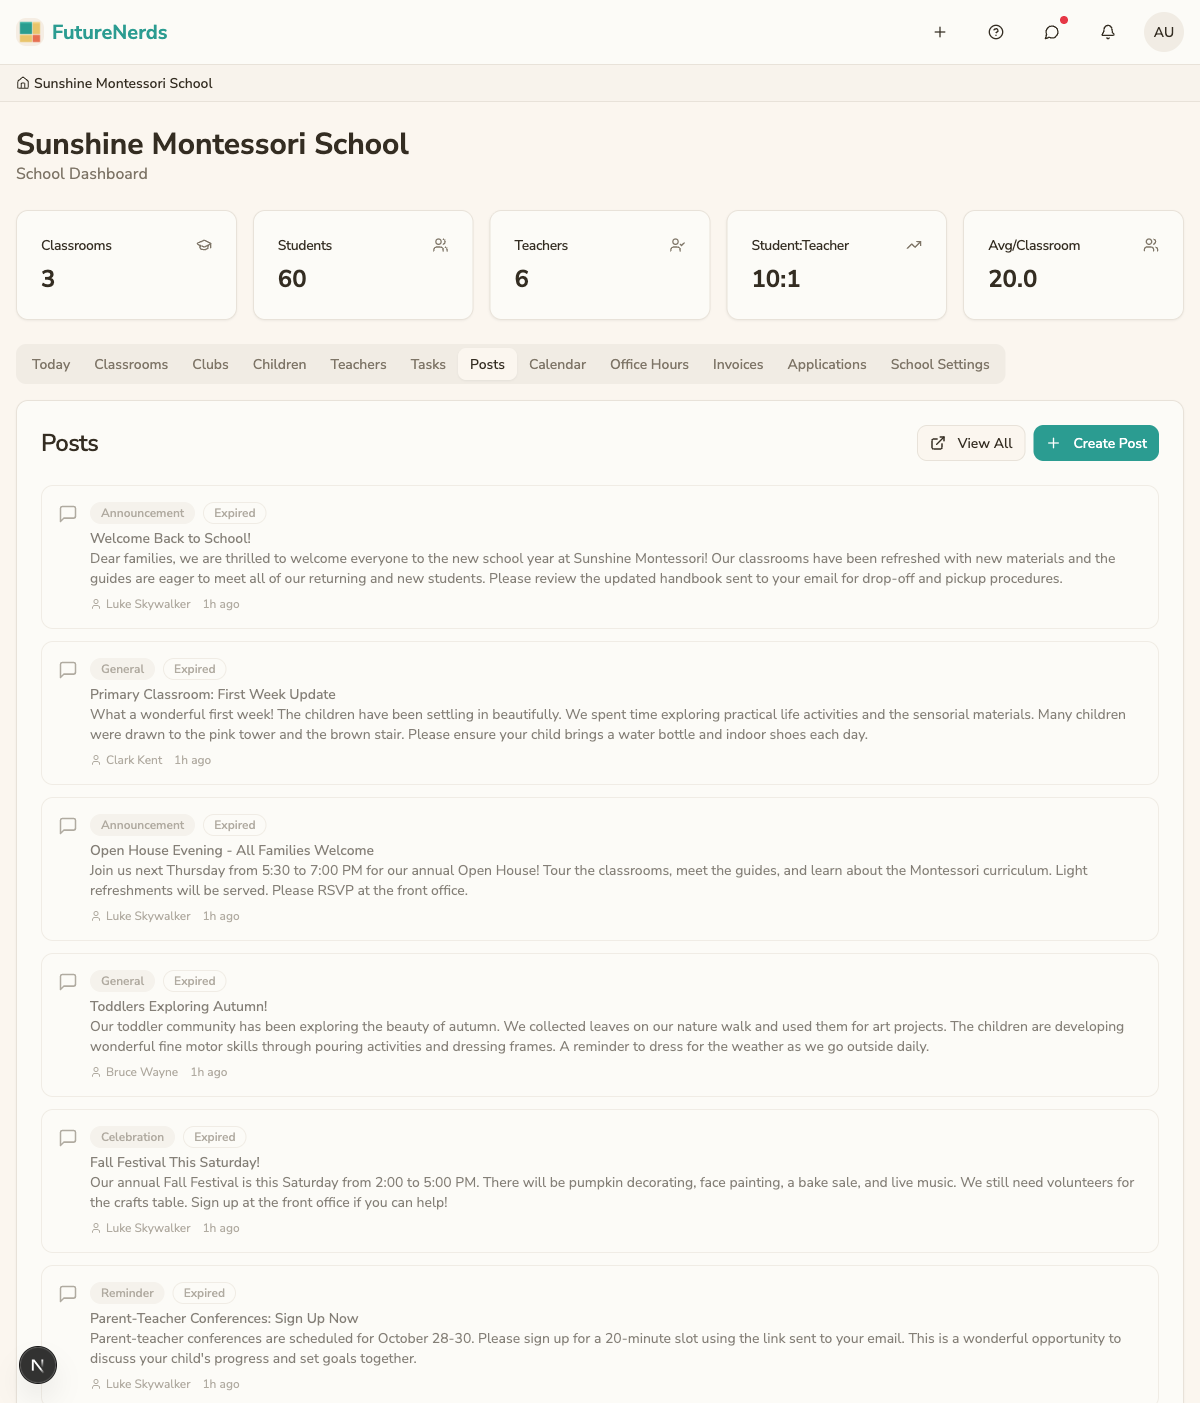
For a conversation rather than an announcement, use Messages: direct messages and classroom channels, with attachments, polls, and reactions.
12. Add a calendar entry
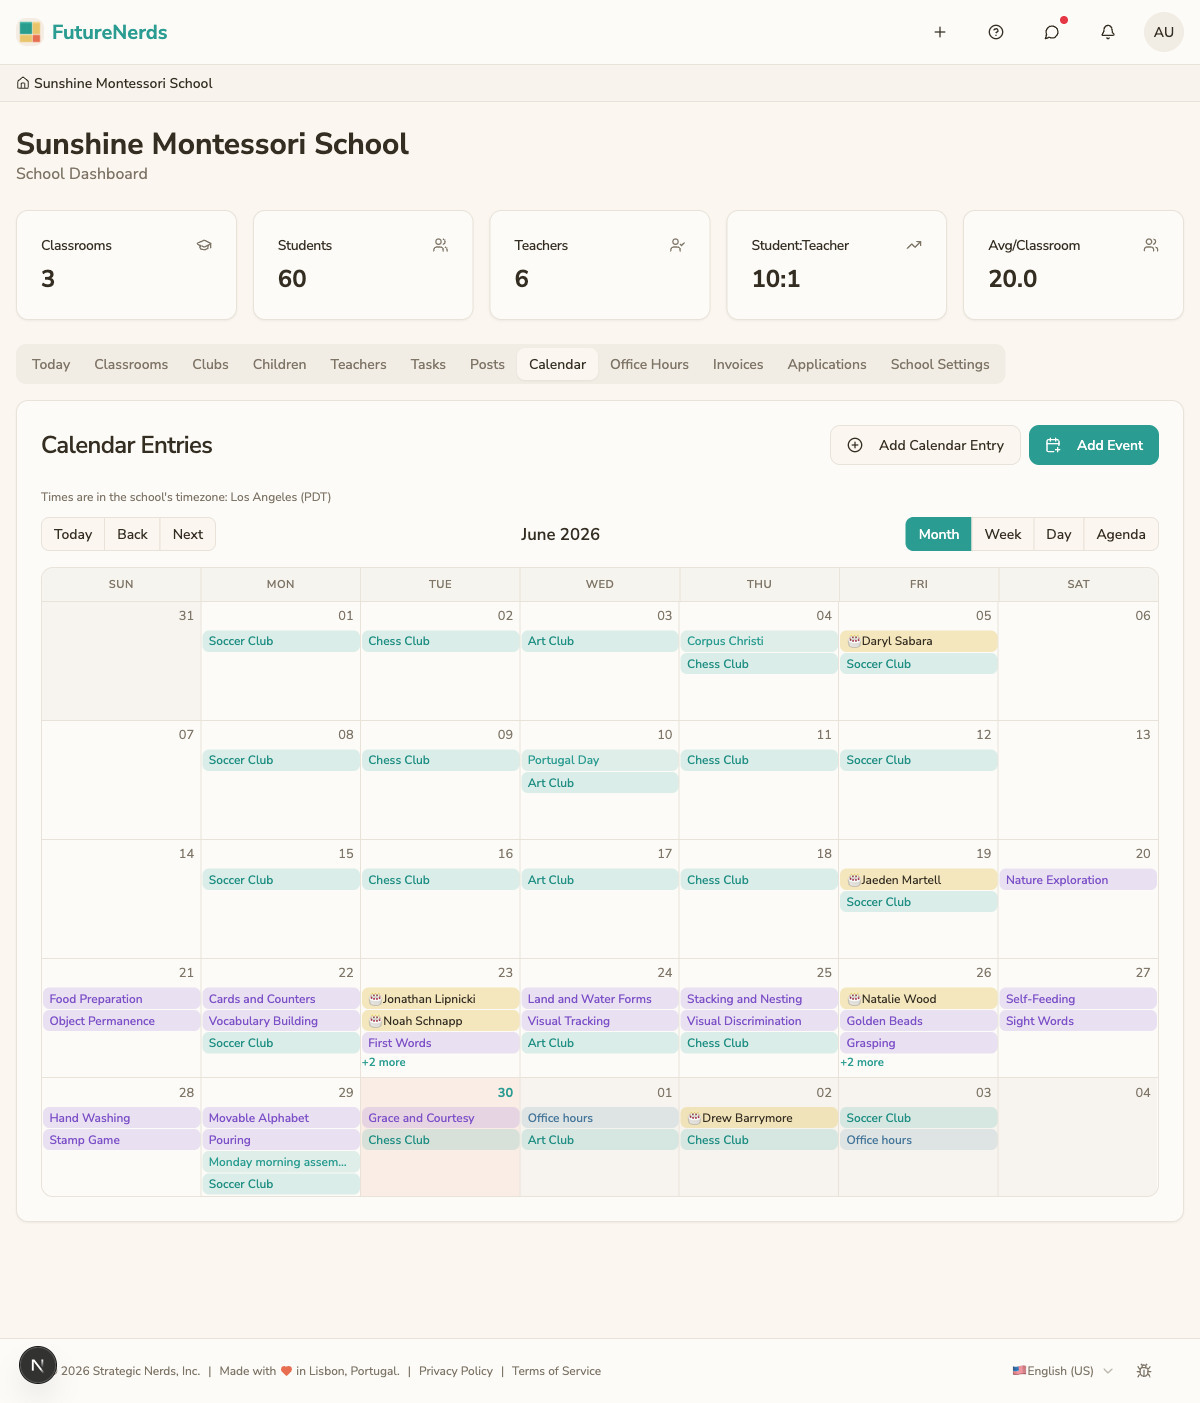
Open Calendar in the top bar and click Add to Calendar for anything families should know about: a closure, a field trip, picture day, a parent evening. Calendar entries show on every parent's Today page and update live.
13. Upload this week's cafeteria menu
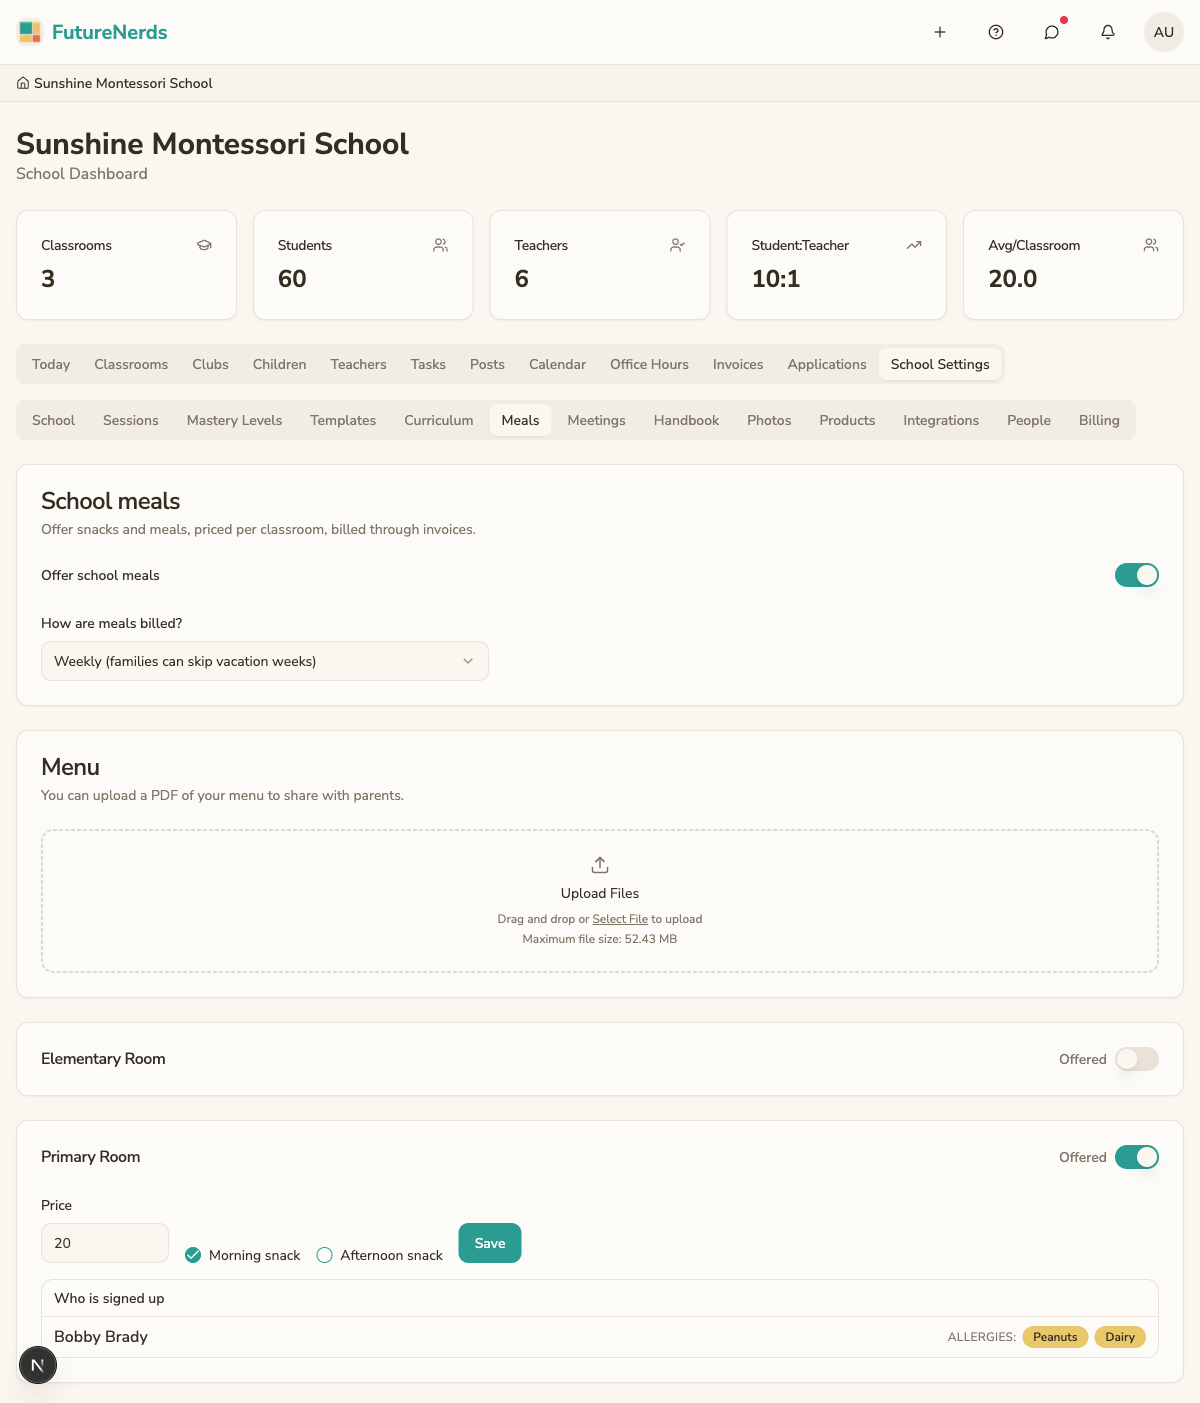
If your school serves meals, open School Settings from your avatar menu, then open Meals. Turn the meals program on, set your snack and meal offerings per classroom, and upload the week's menu. Parents see the menu and, where you allow it, manage their child's meals.
14. Create an after-school club
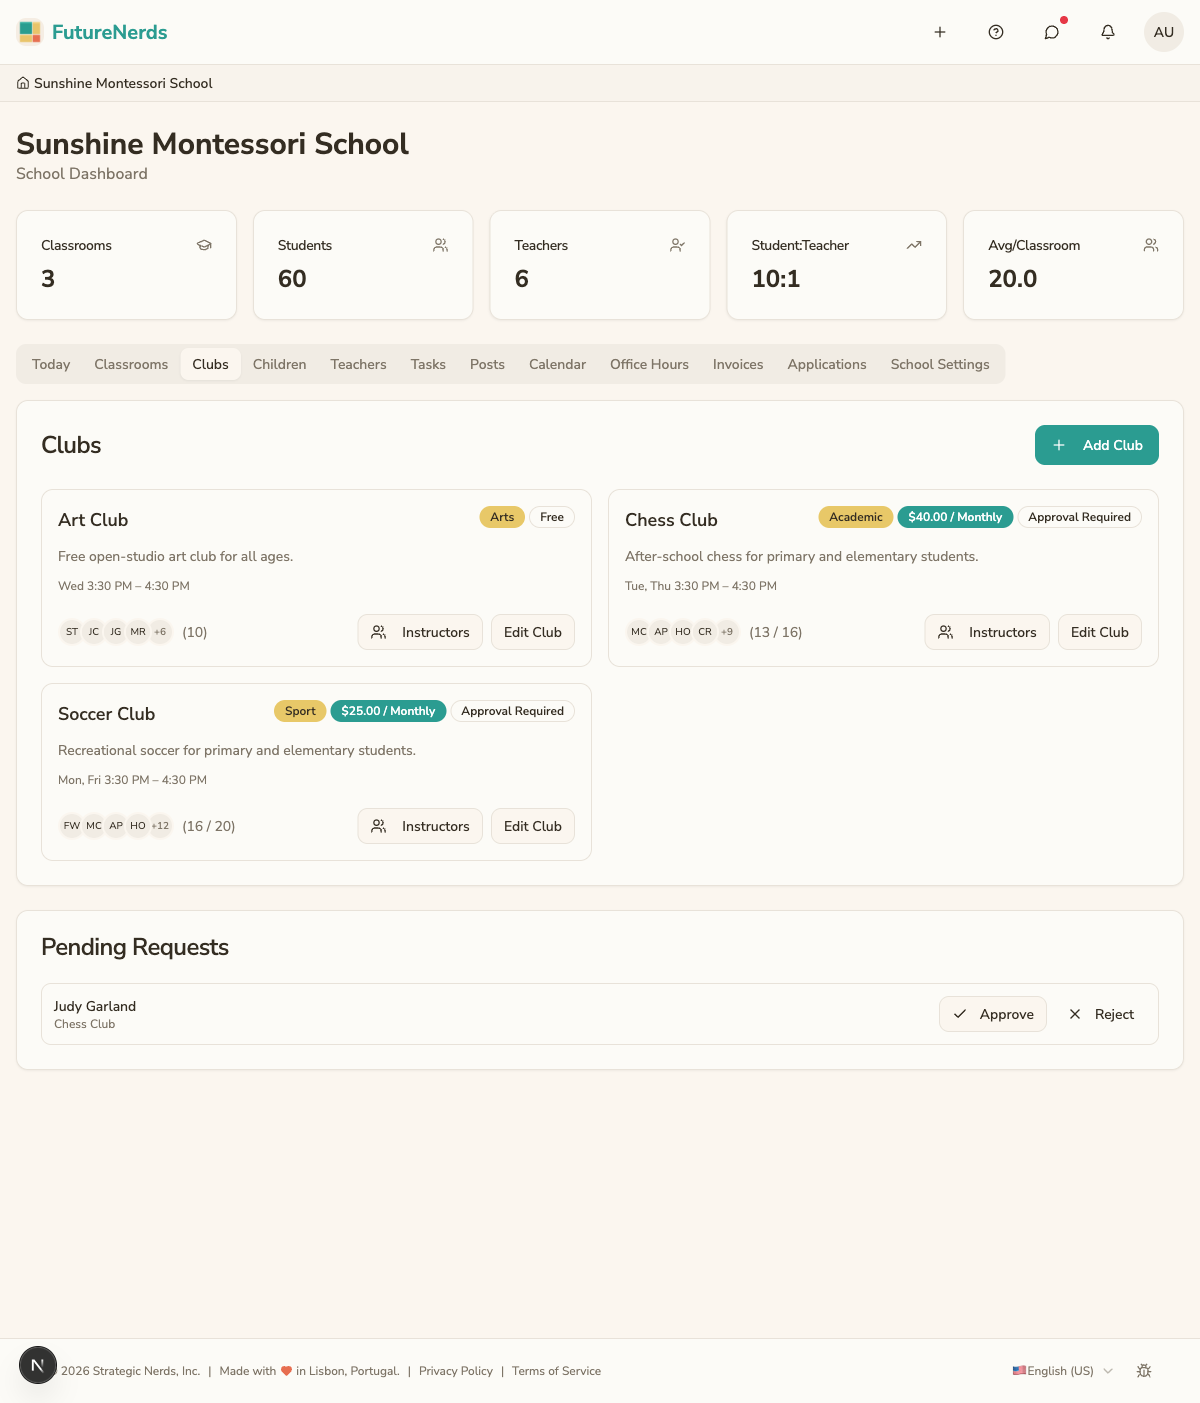
Open Rooms, switch to Clubs, and click Add Club: chess, soccer, art, whatever you run after hours. Set the schedule, whether it is free or has a fee, and whether joining needs your approval, then click Create Club. Parents subscribe their children from Billing → Subscriptions, and staff Approve or Reject requests on the Clubs list.
15. Configure invoices and Stripe payments
To bill families, connect Stripe and set up what you charge. In School Settings, open Pricing for tuition and fees, Store Products for merchandise, and Invoicing to connect Stripe so parents can pay online.
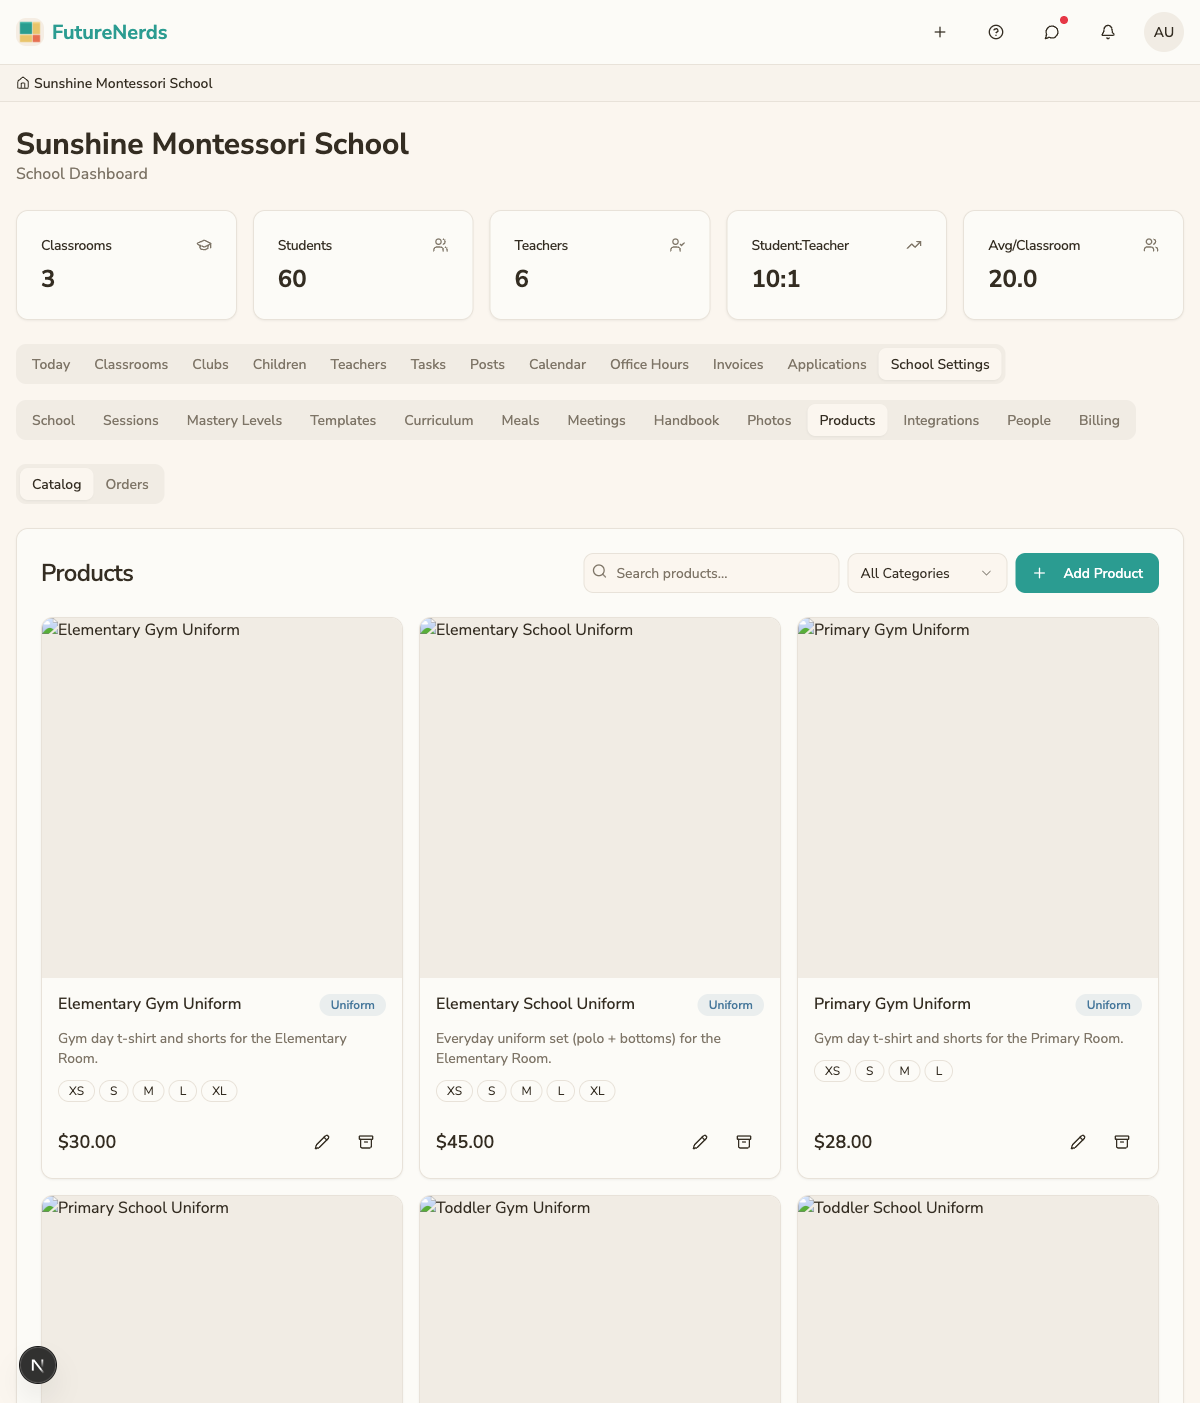
Stripe handles the card payments; FutureNerds creates the invoices and records what is paid.
16. Send out your invoices
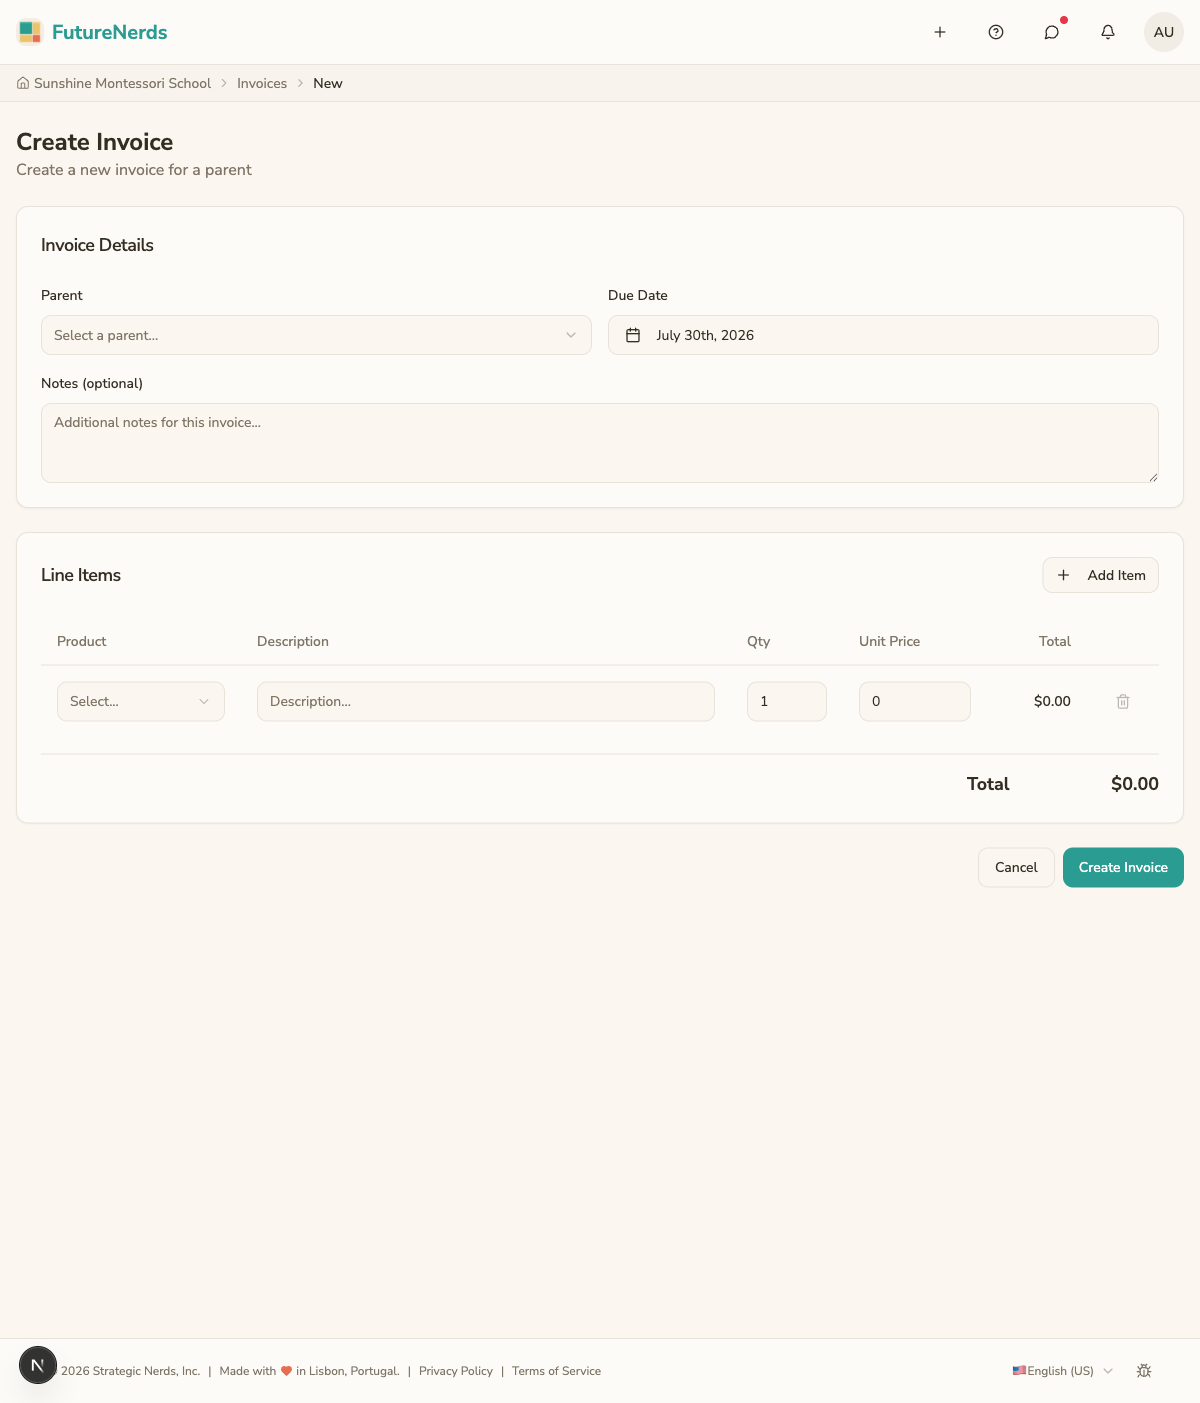
Open Invoices in the top bar and click Create Invoice. Pick the family, add line items from your products, and save the draft, then send it. The parent gets the invoice from Billing in their avatar menu and pays it with Pay Invoice. Outstanding amounts show on the Invoices page.
That is the full lifecycle. From here, your week settles into a rhythm: teachers take attendance and record observations, you handle applications and billing, and families stay in the loop. The rest of this help center covers each area in depth.
Was This Helpful?