Administrator
OperationsCreating and managing invoices
Create invoices, track payments, and manage billing for your school.
Last updated Oct 1, 2026
Billing overview
FutureNerds includes built-in billing tools so you can invoice families directly from the platform.
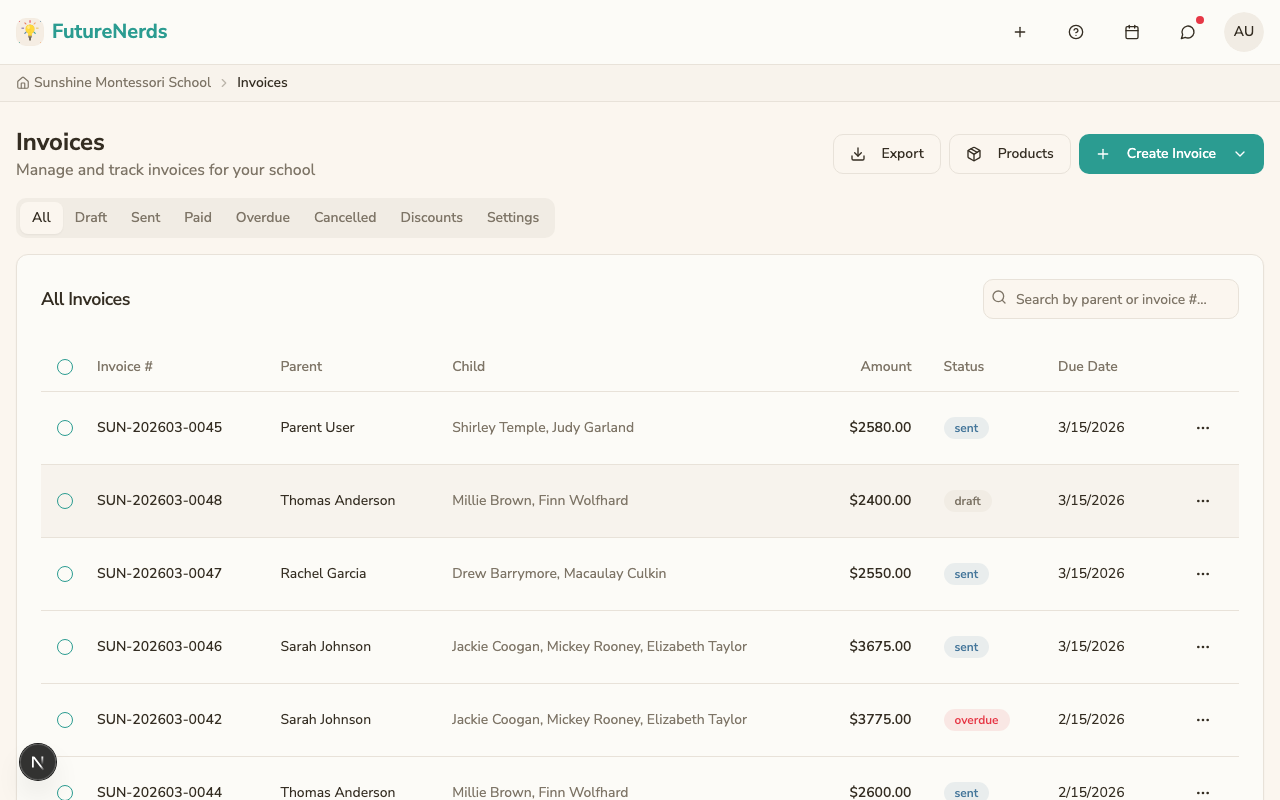
Creating an invoice
- Open Invoices in the top bar.
- Click Create Invoice.
- Select the family or child.
- Add line items (tuition, fees, materials, etc.).
- Set the due date.
- Click Create Invoice again to save the draft, then send it. The family receives an email with a link to view and pay.
Invoice statuses
- Draft -- not yet sent to the family.
- Sent -- the family has been notified.
- Paid -- payment received.
- Overdue -- past the due date and unpaid.
- Cancelled -- cancelled, so the family no longer owes it.
- Review Needed -- the family uploaded proof of a payment made outside the platform. Check the proof and confirm it to mark the invoice paid.
Managing invoices
The Invoices page has a tab for each status and a search box that finds invoices by parent name or invoice number.
Open a sent or overdue invoice and use Actions to:
- Record Payment when the family paid outside the platform (cash, check, and so on).
- Resend Invoice to email the family again.
- Download PDF to save a copy.
- Cancel Invoice if it was created by mistake.
- Issue credit note to reduce what the family owes.
A draft invoice has a Send button. A paid invoice has Refund.
Recurring invoices
Monthly tuition does not live as a "recurring invoice" button on the invoice list. Set it up in School Settings:
- Open School Settings, then Invoicing.
- Under Automatic Invoicing, turn on Automatically generate invoices.
- Open Pricing for the tuition, fees, and discounts those invoices will use.
Tips
- Send invoices at least a week before the due date.
- Use line items to break down charges clearly.
- Review overdue invoices regularly and follow up with families.
- You must connect your Stripe account before families can pay online.
Was This Helpful?